Thursday, December 27, 2012

iPod Drink Boxes


My daughter is having a Dance Party Birthday party and I thought I would be cute to jazz up some drink boxes.
I purchased some neon paper at Target, used white and gray paper for the circles and rectangle and stick strip tape and glue stick to adhere everything. An easy and fast themed addition to the party.
 
Here's a few measurements:
 
The neon paper is 8 1/2" x 4"

the grey circles are 1/2" inch

the white circles are 1 1/4"
the rectangles are 1 1/4" x 1 3/4"

Wednesday, December 19, 2012

When Life Give's You Lemons...You Make Lemon Vodka of Course

Lemon Infused Vodka


Learning how to make flavored vodka is quite simple and allows for creativity. Of all alcohols, vodka serves as one of the best for flavor infusions because its neutral nature easily carries the flavors with which it''s infused.
Because your final product will only be as good as the ingredients you use, start with a moderate to high quality vodka as a base for your flavored vodka recipe. Although low-quality vodkas may hold flavor, they won''t be as smooth or tasty as premium brands. Keep in mind, however, that top-shelf vodkas are best enjoyed on their own. A good rule of thumb is to simply choose a middle-of-the-road vodka that you would also enjoy straight.

To make lemon flavored vodkas, follow these steps:

  1. Peel the zest of 3 large lemons making sure to leave the rind behind. (that will make the vodka taste bitter) I used my sharp pearing knife to cut the skin off the lemon in a few long strips. This makes it prettier in the bottle.
  2. Add the lemon peel to a sealable bottle and add vodka.
  3. Cover the container tightly and store it in a cool, dark, dry place.
  4. Shake the container gently every couple of days.
  5. In about a week you should be able to serve it but test it first. Chill it before serving and make your favorite cocktail using it.

I'm giving mine away as a hostess gift for the holidays.

Monday, December 17, 2012

Royal Icing for Cut Out Cookies

We've all made that icing with the powder sugar and water, right? Well, let's get all grown up and make something a little more sophisticated by adding a simple ingredient, Meringue Powder. Don't get me wrong, there's a time and place for the plain old icing but this is great and versatile. Plus it makes your cookies look professional.
This icing dries candy-hard, which is ideal for decorating cookies, flowers, detailing, but not so good for decorating cakes.

Here we go:
3 T Wilton Meringue Powder
4 cups sifted confectioners sugar
4-6 T water

if your making stiffer icing, you'll want 1-2 T less water.

Beat all ingredients at low speed for 7-10 minutes until icing forms peaks. At this point I separate the icing into two batches. One that will remain as it, stiff, that I cake use as "piping" and the other stays in the mixing bowl to my my "flood icing". I add 1-2 T water to the bowl and thin the icing out again, using this as my "flood" icing.
You can add food coloring to either and decorate till your hearts content.


Sunday, December 16, 2012

Ice Cream Sandwich Cookies: Too pretty to eat

Hi,
Here's a really fun and cute way to make cut out cookies AND ice cream sandwiches. These cookies look so pretty and bakery-like. I'm always impressed with the finished product. It actually looks like I'm the baker in the family.

Sugar Cookie (Cut Out Dough)

2 c butter, softened
3 c sugar
4 eggs
1 T. vanilla extract
7 c flour
2 tsp baking powder
1 tsp salt

Cream butter and sugar. Add eggs and flavorings and mix well. Stir flour, baking powder and salt together. Add to batter and mix well.
Chill 3-4 hours or overnight before using.
Roll dough into a log about 2" thick


Using a cake leveler, slice the dough into 1/2" slices


gently press down along the sides on the wire.


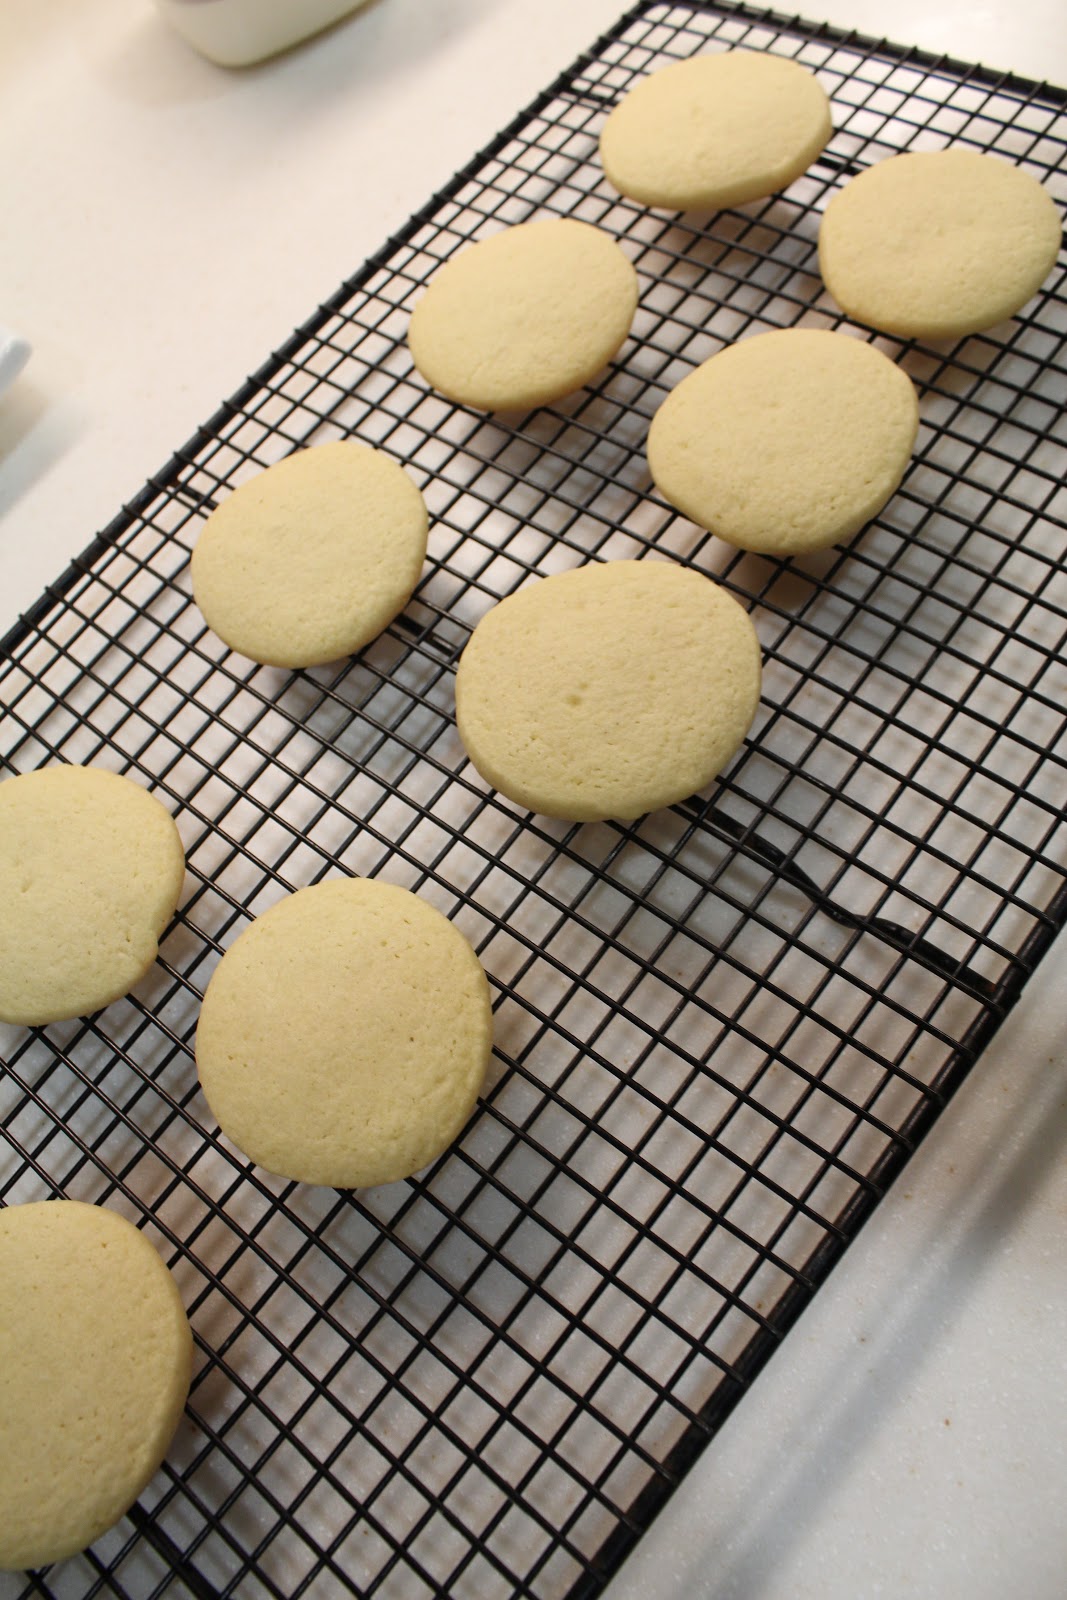
bake at 400 for 4-5 minutes, but watch them. Place them on a cooling rack to cool.


When cool dip the edges in Royal Icing


Next, roll edges in Sanding Sugar (William Sonoma) and place back on drying rack.


Drizzle about 1 T of icing on top of each cookie, gently spreading it to the ends. Let dry.


Once dry, they will shiny, hard and gorgeous. Eat them as they are (so good) or even better with your favorite ice cream in the middle.


Saturday, December 15, 2012

Christmas Ice Cream Social

Hello everyone!

This week I was featured on Design Dazzle!

Here's my post:

 I'm Karyn, from Sugar Swagger. In the past I've contributed to the Summer Camp series on Design Dazzle and showed my summer picnic ideas. http://designdazzle.blogspot.com/2012/06/summer-camp-picnic-basket.html. I'm honored to have been asked back to share some holiday fun with you and your kids.
My husband is the baker in the family so when I asked him to make ice cream for our ice cream social, he was excited to involve the kids again. So today I'm going to show you how to put on your very own Christmas Ice Cream Social. 
Items Needed for your Ice Cream Social:
  • Invitations
  • Cones or cups
  • Holiday sprinkles, chocolate chips and other toppings of your choice
  • colorful napkins/table cloth
  • brightly colored spoons

Recipe for Candy Cane Ice Cream:
2 cups 2% milk
2 cups heavy cream
1 cup sugar
1/2 teaspoon salt
1 teaspoon vanilla extract
1/2 teaspoon peppermint extract

1 cup crushed candy canes


Put the peppermint candy into a plastic bag and beat with the end of a rolling pin (This part is fun for this kids) until the candy is broken into small graduals.

In a large bowl, stir together the milk, cream, sugar, salt, vanilla extract and peppermint extract until the sugar has dissolved.
Pour the mixture into an ice cream maker, and freeze according to the manufacturer's instructions. After about 10 minutes into the freezing, add the crushed candy canes. After the ice cream has thickened, about 30 minutes later, spoon into a container, and freeze for 2 hours.

Before your guests arrive place all your toppings on a table with napkins, cup, cones and spoons.
When your ready to serve, have your guests build their own ice cream cone or sundae with toppings of their choice. Have fun and enjoy sharing stories about your time in the kitchen together.


Merry Christmas!

Saturday, December 8, 2012

OPI Who?


So I know I haven't posted in a while but I have a BUNCH of posts I'm getting ready to push out. In the meantime I had to share my favorite polish or they actually call it a varnish. I LOVE LOVE LOVE this polish. Rich, well wearing colors that will make you throw out your OPI. I'm wearing this red now and love it.

Nail Duo - Throb & Spartan
http://www.illamasqua.com/shop/products/nails/nail-duo-throb-spartan
or you can pick it up at Sephora.

Monday, November 12, 2012

Garlic Paste

I recently bought a really large bag of peeled garlic from Costco and then saw that it was soon about to expire so I made some garlic paste. It's really easy to make and MAKES COOKING EASIER. So every time you need to add garlic and Olive Oil to someone you just walk over to your freezer and scoop and spoonful out. This is great for making garlic bread too. The consistence to perfect.

Here's how to make it:
1. Clean the garlic, then peel it by removing skin. I bought a large bag of peeled garlic from Costco so I didn't need to peel and clean it. You can do the same.
2. Using a food processor, insert the grading blade. Add as many garlic cloves as you like or will fit.
3. Remove the shredded garlic from the food processor and place in a bowl.
4. Switch the blade to the long blade, shown in the photo and add the garlic back to the food processor.
5. Pour enough olive oil to create a creamy texture. Process this for several seconds until all of the garlic is thoroughly blended into the oil.

6. Scrape the garlic mixture into small freezer containers, label and date them.

This can be used as needed and will remain soft enough to portion out with a spoon when it is time to use for cooking.


Saturday, November 10, 2012

Please Bring It - On Line Sign Up Sheets

If you have not heard of this website it just might be your new favorite thing. If you're are a parent that helps with classroom parties, a soccer coach that needs to assign snack duty, having a pot luck and need to organize what others are bringing this is the site for you. Sign up is free!

The easy way to organize people and events

  • Customizable, blank sign up sheet templates
  • Add items or times
  • Let guests add items
  • Guests don’t need to login to sign up
  • Guests get email reminders
  • Printable sign up sheets
  • Share with anyone
  • Feel the love

http://signup.pleasebringit.com/

Thursday, November 8, 2012

Fresh


Fresh


I think it's kinda funny that my one of my new favorite things involves that word "sugar". I just can't seem to stay away from that word. But why try, right? If you haven't tried one of these fabulous lip treatment sticks, please do so. You'll love it.
 You can pick one up at Sephora for about $22.

Wednesday, October 31, 2012

Halloween Highlights

Juice Box Monsters for First Grade

Mummy Candy Bars for the kids classmates

A sweet candy fairy and my pirate. He hates the beard.


carving time!

my pirate inspired pumpkin. I've always wanted to try this and if you have the right tools it's acutally not hard at all. I have carving tools from art school that I used for wood carvings so I pulled them out. If you have ceramic tools that you've used for clay those will work really well too.

Friday, October 12, 2012

Halloween Toes

It's that time of year, tacky or not, that I put something festive on my toes. It's just tradition and every year it's something new.


Tuesday, October 9, 2012

Bacon Toffee

Bacon is in everything lately and even heard something about Toffee Bacon so I thought I would try it using one of my husband's favorite toffee recipes. It takes about 15 minutes to make and it's super yummy. I brought this to a party the other night and it was gone in no time. Plus the guys loved it too since there's bacon in it. Who doesn't love bacon?

Bacon Toffee


Makes 2 pounds

Directions

  1. In a large heavy bottomed saucepan, combine the butter, sugar and salt. Cook over medium heat, stirring until the butter is melted. Allow to come to a boil, and cook until the mixture becomes a dark amber color, and the temperature has reached 285 degrees F (137 degrees C). Stir occasionally.
  2. While the toffee is cooking, cover a large baking sheet with aluminum foil or parchment paper.
  3. As soon as the toffee reaches the proper temperature, add 3/4 cup bacon into the toffee mixure. Pour mixture out onto the prepared baking sheet. Sprinkle the chocolate over the top, and let it set for a minute or two to soften. Spread the chocolate into a thin even layer once it is melted. Sprinkle the remaining bacon over the chocolate.
  4. Place the toffee in the refrigerator to chill until set. Break into pieces, and store in an airtight container.

Monday, October 8, 2012

Before and After Dresser Makeover


My mom and I laugh about this dress because I bought it for $14 at storage locker sale and it cost my $6 to paint it black some 15 years ago. This thing will outlast us all. It was fine the way it was really just wanted to change it up for my sons new room. So with some paint, a roller and some new knobs I bought at Lowes he has a new dresser. All for under $40 no less. Inspiration: Pottery Barn Kids


BEFORE


AFTER


Sunday, October 7, 2012

a chair makeover

 
I've had these boring brown chairs for a while and thought they needed a change. My home is white, gray and cream and tan and I wanted something that would blend and transition to every holiday. So if I'm decorating for Christmas, my ORANGE chairs won't clash or Halloween and my Red chairs won't clash. Ya gotta think about these things, right? I wanted peices that pop, like pillows, art work, vases, throws, sooooo this is my chair transformation.
 
BEFORE

 AFTER


Sunday, September 30, 2012

School Spirit Baskets for Auction

Here's a look at our school Spirit Baskets that were created for this years' school auction.  Each grade was assigned a color. Parents were asked to bring in anything in their childs color theme to add to the basket. There's all sorts of random items, from iPods, Uggs and Kindels to paper lanters and Mike and Ike's and dish towels. They were an enormous hit and raised a lot of money for the school. And to the ladies who built them, hats off to you. 


Saturday, September 29, 2012

Smore's Bar

For this years school auction the theme was Cowboy Chic and so we had to build a smore's bar for the occasion. I think it was a success.


Wednesday, September 26, 2012

Candy Country

I've been a little busy with our move but I'm back!

For the kids biggest school fundraiser of the year, they ask each class to complete an art piece that will be auctioned off during the event. So with Modge Podge in hand, I asked the first graders to collect candy wrappers over the summer. I had each student decoupage two candy wrappers on to regular drawing paper. We let them dry over night then using a map I had blown up, I cut the wrappers into each shapely state and placed all the states together again to create a country.
We added a plaque to the corner, too.

Monday, August 20, 2012

Sushi Roll Sweets

Hello All,

My kids love sushi so I thought for sushi night I'd make some fun treats that trick the kids.
Here's what we made.What is it? A sweet, pop in your mouth treat, made with marshmallows, coconut, Swedish Fish and licorice. So much fun.


Here's what you'll need to make these sweet treats.

1 can vanilla frosting
1 Bag of marshmallows
Coconut
Swedish Fish
Lime flavored Tootsie Rolls
black rolled licorice

First take a marshmallow and cover it on frosting, then roll it in coconut. Next, place a Swedish Fish on top (securing with a tab of frosting), finally wrap with licorice. I softened up the Tootsie Rolls in microwave then easily pulled apart for the accent of wasabi.

Saturday, August 4, 2012

Our New Home

So excited to be moving into our new home. It's a chance for me to style this thing the way I've always wanted to. Sleek, color (orange if you please) and fab. Can't wait to start showing you some before and after photos. Let the deco/design begin!

311 Maplewood Ct, Paso Robles, CA 93446
our view from the family room.